A self-tape audition is now a normal part of the casting process for actors. Whether you are auditioning for film, television, commercials, theater, or representation, you may be asked to record your audition at home and send it in quickly.
The good news is that you do not need a professional studio to make a strong self-tape. You just need a clean setup that lets casting focus on the most important thing: your performance.
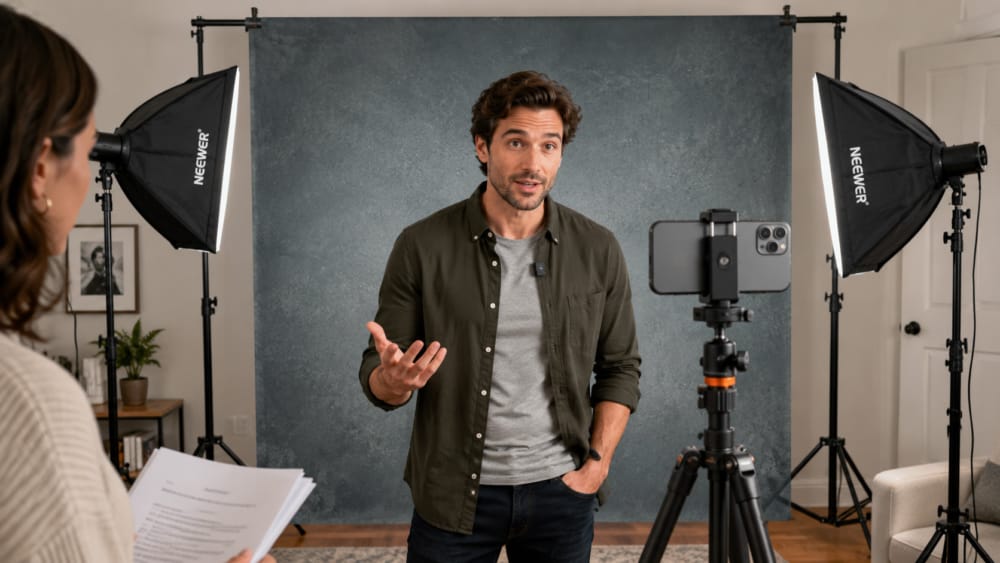
As a headshot photographer who works with actors, I always tell clients that your self-tape does not need to look over-produced. It needs to look clean, sound clear, and feel professional. The goal is not to show off your equipment. The goal is to make it easy for casting to see your eyes, hear your voice, and believe the scene.
The Basic Self-Tape Audition Setup Every Actor Needs
A good home self-tape setup can be simple and affordable. The main pieces are:
- A clean background
- A stable phone or camera setup
- Soft lighting
- Clear audio
- A quiet room
- A reader or virtual reader
- A simple way to submit the file correctly
Below are the most useful things to buy if you want to create a dependable self-tape setup at home.
1. A Clean Background or Backdrop System
Your background should not compete with your face. Avoid busy rooms, posters, shelves, mirrors, windows, kitchen areas, or anything that distracts from your performance.
The safest choices are usually:
- Gray backdrop
- Blue-gray backdrop
- Light blue backdrop
- Neutral wall
- Collapsible backdrop
- Fabric backdrop on a stand
A backdrop system is helpful because it gives you a repeatable setup. You can put it up, tape, take it down, and know that your frame will look professional every time.
If you use fabric, try to pull it tight and place yourself a few feet in front of it. This helps reduce shadows and makes wrinkles less noticeable. Avoid standing directly against the backdrop, because that can create harsh shadows and make the tape look flat.
What I recommend:
- Budget, repeatable setup: the NEEWER 8.5x10ft Adjustable Backdrop Stand Kit (background support system with crossbars, clamps, and sandbags). It is affordable, packs down fast, and gives you a clean, professional frame every time.
- Background — Kate Collapsible Backdrop (Blue/Gray) for a premium look
2. A Phone Tripod or Selfie Stick Tripod
Most actors can shoot a great self-tape on a modern smartphone. The mistake is not the phone. The mistake is holding the phone, leaning it against something unstable, or filming from a bad angle.
Your camera should be stable and at eye level. A tripod or selfie stick tripod makes this much easier.
For most auditions, shoot horizontally unless the casting instructions specifically ask for vertical. Place the phone at eye level, not below your chin and not looking down from above. You want the frame to feel natural and direct.
A tripod also saves time. When an audition comes in with a quick deadline, you do not want to spend 30 minutes stacking books and trying to balance your phone.
What I recommend: the EUCOS 62″ Phone Tripod & Selfie Stick with a Bluetooth remote. It extends to eye level, folds down small for travel, and the included remote means no scrambling to hit record.
3. A Phone Mount
If your tripod does not already include a phone holder, you will need a phone mount. This is a small but important piece of gear.
A good phone mount lets you attach your phone securely to a tripod or light stand. Look for one that fits your phone with its case on and allows horizontal filming.
Quick note: the EUCOS tripod above already includes a phone holder, so most actors will not need a separate mount. Only buy one if you are pairing your phone with a different tripod or light stand. → NEEWER Metal Phone Tripod Mount
4. Soft Lighting
Lighting is one of the fastest ways to make your self-tape look more professional.
You want soft, even light on your face. Casting needs to see your eyes clearly. Avoid harsh shadows, bright windows behind you, overhead ceiling lights, or lighting that makes your face look blown out.
Simple lighting options:
- Two softbox lights
- Natural window light, if consistent and indirect
A ring light can be easy for beginners because the phone often mounts in the middle. Softboxes can look more natural and flattering because the light source is larger and softer.
Place your light in front of you, slightly above eye level, and test the brightness before recording. You do not want the light so strong that it washes out your skin tone.
What I recommend: the NEEWER 2-Pack Softbox Lighting Kit (RGB, app-controlled). Two softboxes give you that larger, softer, more flattering light, and you can dial in brightness and color so your skin tone reads natural on camera.
A second option (cordless): the XPAISYQC Rechargeable LED Video Light. It runs on batteries, so you are not tied to an outlet, which helps in tight rooms or when you travel. Plan to buy two of them, one on each side, so your light stays even.
5. A Wireless Microphone for Your Phone
Audio matters more than many actors realize. A great performance can be hurt by echo, traffic noise, air conditioning, or a reader who is louder than the actor.
A wireless lavalier microphone that connects directly to your phone can make your voice clearer and more professional. This is especially helpful if you live in an apartment, have street noise, or need to tape in a room with echo.
Look for a wireless mic that works with your phone connection:
- Lightning for older iPhones
- USB-C for newer iPhones and Android phones
- Adapter-compatible if needed
Do a quick test before every audition. Make sure the mic is actually connected and recording from the external microphone, not the phone’s built-in mic.
What I recommend: the DJI Mic Mini (2 TX + 1 RX + Charging Case). It is tiny, clips on discreetly, has noise cancelling, and connects cleanly to your phone or camera. Two transmitters also means you can mic your reader if needed.
6. A Quiet Room With Less Echo
Gear helps, but the room matters too.
Choose the quietest room you can. Turn off fans, air conditioning, loud appliances, and notifications. If the room sounds echoey, add soft materials around the space:
- Rug
- Blanket
- Curtains
- Soft furniture
- Padded wall hanging outside the frame
You do not need to sound like a recording studio. You just need the dialogue to be clean and easy to understand.
7. A Reader Setup
Your reader should be close to the camera but not directly in the lens. In most self-tapes, you should look slightly off camera, toward your reader. Do not look directly into the camera unless the instructions ask for it.
Your reader should also avoid overpowering your voice. The audition is about you, not the reader. If your reader is in the room, place them near the camera. If they are on Zoom or FaceTime, position the screen close to the camera so your eyeline still looks natural.
8. Framing: How to Compose Your Self-Tape Audition Shot
Unless casting gives different instructions, a good basic self-tape frame is usually chest-up or mid-chest-up. Casting wants to see your eyes, expressions, and enough body language to understand the performance.
Basic framing tips:
- Camera at eye level
- Actor centered in frame
- Horizontal video unless told otherwise
- Chest-up framing for most scenes
- Leave a little headroom
- Avoid cutting off the top of your head
- Keep the reader close to the camera for a natural eyeline
For full-body slates, you can adjust the frame or record a separate slate if requested.
9. Wardrobe for Self-Tapes
Wear something simple that suggests the role without becoming a costume. Avoid loud patterns, logos, tiny stripes, distracting jewelry, and colors that blend into your backdrop.
The goal is to help casting imagine you in the role while still keeping attention on your face and performance.
Good wardrobe choices:
- Solid colors
- Clean neckline
- Simple layers
- Character-appropriate but not costume-heavy
- Colors that separate from the background
10. Do Not Over-Produce the Tape
A self-tape is not a short film. Avoid dramatic music, title cards, heavy editing, filters, digital backgrounds, fancy transitions, or cinematic camera moves.
Keep it simple:
- Follow the instructions
- Record clean takes
- Use hard cuts if needed
- Label the file correctly
- Submit in the requested format
- Do not add unnecessary effects
Casting wants to evaluate your acting. Anything that distracts from the performance can work against you.
Self-Tape Audition Day: A Simple Step-by-Step
Once your gear is ready, your self-tape audition day should feel calm, not chaotic. Here is the simple order of operations I share with actors so nothing important gets missed.
- Charge your phone and clear enough storage for several takes.
- Mount the phone on your tripod at eye level, and shoot horizontally unless casting asked for vertical.
- Frame yourself from the chest up, with a little headroom and your eyes about a third of the way down the screen.
- Place your reader just off to the side of the lens so your eyeline stays close to camera.
- Set your light in front of you, soft and even, so casting can clearly see your eyes.
- Record a ten-second test and play it back. Check your audio, your light, and your framing before you commit.
- Slate as instructed, then record two or three clean takes of the scene.
- Watch your best take on a larger screen, name the file correctly, and submit it.
That is the whole process. Most of the work is in the setup, so once you are dialed in, you can self-tape quickly the next time a request comes in. If you are still building your audition pipeline, our guide to the best online casting websites for actors is a helpful next step.
How to Slate and Name Your File
A slate is a short introduction at the start of your tape. Casting offices set their own rules, so always follow their exact instructions first. When they do not specify, a clean slate usually includes your name, your height, and your representation, and sometimes the role you are reading for. Keep it simple and natural, then move into the scene. For union members, SAG-AFTRA also offers self-tape guidance.
File naming matters more than actors expect. A casting office may receive hundreds of tapes, so a clear name helps yours get found. A common format is LastName_FirstName_Role.mp4, but if casting gives you a specific naming format, use theirs exactly. When in doubt, match the audition notice word for word.
5 Common Self-Tape Mistakes to Avoid
Most self-tape audition problems are small and easy to fix once you know to look for them. These are the ones I see most often.
- Backlighting. A bright window behind you turns your face into a shadow, so face the light instead.
- Eyeline too low. A camera below eye level is unflattering and reads as amateur, so raise it to eye height.
- A reader who is too loud. The reader should support you, not compete with you, so keep them quieter in the mix.
- A frame that is too wide. Casting wants to see your eyes, so come in to a comfortable chest-up shot.
- A busy background. Clutter pulls focus, while a clean, neutral background keeps attention on your performance.
Simple Self-Tape Checklist
Before you submit, check:
- Is the video horizontal, unless vertical was requested?
- Is the camera stable?
- Is the camera at eye level?
- Can casting clearly see your eyes?
- Is the background clean and simple?
- Is the audio clear?
- Is the reader quieter than you?
- Did you follow the slate instructions?
- Did you follow the file naming instructions?
- Did you watch the tape before sending?
Recommended Self-Tape Gear List
Here is a simple gear list for actors who want to build a home self-tape setup:
- Background system — NEEWER 8.5x10ft Adjustable Backdrop Stand Kit
- Background –Kate Collapsible Backdrop (Blue/Gray) for a premium look
- Phone tripod or selfie stick tripod — EUCOS 62″ Phone Tripod & Selfie Stick with remote
- Softbox light kit — NEEWER 2-Pack Softbox Lighting Kit
- Battery option — XPAISYQC Rechargeable LED Video Light (buy two for even light)
- Wireless microphone for phone — DJI Mic Mini (2 TX + 1 RX + Charging Case)
- Extension cord or power strip
- Optional: portable folding table or small stand for your laptop/reader
Self-Tape Audition FAQ
What equipment do I need for a self-tape audition?
You need surprisingly little. A phone with a good camera, a sturdy tripod, soft lighting, a clean background, and clear audio will cover almost every self-tape audition. Start with what you own, and add pieces only as you go.
Can I record a self-tape audition on my phone?
Yes. A modern phone shoots more than enough quality for casting. Mount it on a stable tripod at eye level, shoot horizontally unless told otherwise, and you are ready. The phone is rarely the weak link, while lighting and sound usually are.
What is the best lighting for a self-tape?
Soft, even, front-facing light is best. A window during the day, or a simple ring light or softbox, works well. Avoid harsh overhead light or anything that throws shadows across your face. Good lighting simply makes your eyes easy to see.
What background color should I use for a self-tape?
A clean, neutral background is the safe choice, such as light gray, medium blue, or a soft neutral tone. Keep the background plain so nothing competes with your face. Avoid busy walls, bright colors, or anything distracting behind you.
How should I frame a self-tape audition?
Frame yourself from roughly the chest up, with your eyes about a third of the way down the screen and a little headroom on top. Stay centered, keep the camera at eye level, and leave a little space on the side you are reading toward. Simple, balanced framing reads as professional.
Do I need a microphone for a self-tape?
Not always, but it helps. If your room is quiet, your phone may be enough. However, if casting struggles to hear you clearly, a small wireless microphone for your phone is one of the best upgrades you can make for the money.
What should I wear for a self-tape audition?
Wear something that suits the role without becoming a costume. Solid, simple colors that contrast with your background work best, and avoid loud patterns or bright white that can distract on camera. Let the wardrobe support the character, not pull focus.
Do I need a reader, and where do I find one?
A reader makes a real difference, but you have options. A friend, an acting partner, or a virtual reader over video all work. Keep the reader quieter than you in the mix so your voice stays clearly in front.
How long should a self-tape audition be?
As long as the material requires, and no longer. Perform the scene casting requested, follow their slate and length instructions exactly, and resist the urge to add extra takes or padding. Tighter is almost always better.
What do casting directors look for in a self-tape?
A believable performance they can see and hear clearly. They want your eyes visible, your audio clean, and their instructions followed, including the slate and file naming. A simple, well-prepared self-tape audition lets your acting do the work.
Final Thoughts
A strong self-tape setup gives you confidence. When your background, lighting, sound, and camera are ready, you can stop worrying about the technical side and focus on the acting.
You do not need the most expensive gear. You need a simple setup that works every time.
The best self-tape is clean, clear, honest, and focused on your performance. If casting can see your eyes, hear your voice, and believe the moment, you are already ahead of most actors.
Need a professional headshot to go with your audition reel? Book a session with Headshots LA — actor, theatrical, and commercial headshots in Los Angeles.
One last thing. A great self-tape audition is how you get in the room, and once you book the role, you will want professional headshots that match the actor casting just met on tape. If you are an actor in Los Angeles, my guide to acting headshots in LA is a good next read, and you can book a session online whenever you are ready. Now go set up, hit record, and book it.


